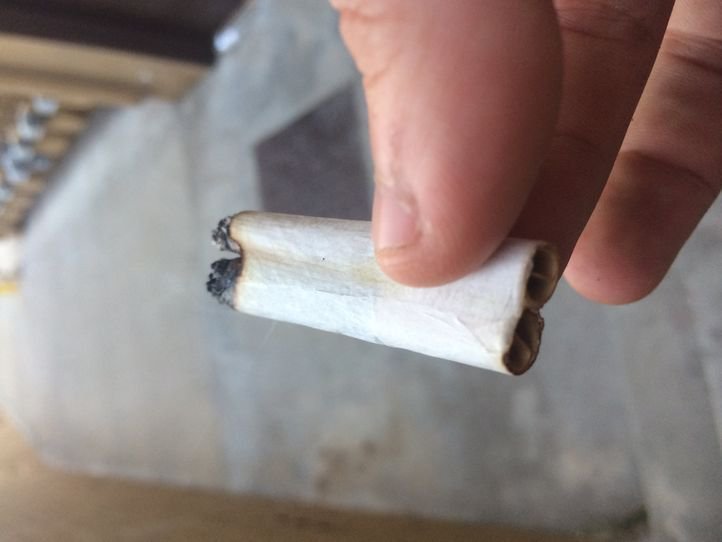
Listen up, my friend! If you’ve ever wondered how to roll a joint that’s smooth, even, and perfectly packed, you’re in the right place. Rolling a joint isn’t rocket science, but it does take a little practice and some insider tips. Whether you’re a first-timer or just looking to up your game, we’ve got everything you need to know right here.
Let’s face it, rolling a joint is one of those skills that can make you look like a total pro—or a total amateur. But don’t worry, everyone starts somewhere. With this guide, you’ll be rolling joints like a seasoned veteran in no time. So grab your supplies and let’s dive in!
Now, before we get started, it’s important to remember that this guide is here to help you learn the basics of rolling a joint in a safe and responsible way. Knowledge is power, and with the right techniques, you’ll be rolling like a champ in no time. Ready? Let’s go!
Read also:The Enigmatic Life Of Simon Cowells Son A Journey Into The Starstudded World
Why Learning How to Roll a Joint Matters
Rolling a joint is more than just a skill—it’s an art form. Knowing how to roll a perfect joint can enhance your experience, save you money, and even impress your friends. Plus, mastering this skill gives you the freedom to enjoy your favorite herb exactly how you want it.
But here’s the thing: not all joints are created equal. A poorly rolled joint can be uneven, messy, and just plain frustrating. That’s why learning the right techniques matters. When you roll a joint correctly, it burns evenly, doesn’t fall apart, and delivers a smoother hit every time.
So, whether you’re looking to roll for yourself or share with others, having this skill in your pocket is a game-changer. And trust me, once you get the hang of it, you’ll wonder why you ever struggled in the first place.
Essential Tools You’ll Need
Before you start rolling, you’ll need a few key tools to make the process smoother and more efficient. Think of these as your secret weapons in the world of joint-rolling. Here’s what you’ll need:
- High-quality rolling papers
- A grinder (optional but highly recommended)
- A filter or crutch (optional but helpful)
- Your favorite herb
- A flat surface (like a table or tray)
- A little patience and practice
Don’t stress if you don’t have everything on this list. You can still roll a decent joint without a grinder or filter, but having these tools can definitely improve the overall experience.
Choosing the Right Rolling Papers
When it comes to rolling papers, options abound. But not all papers are created equal. Choosing the right rolling paper can make a big difference in how your joint feels, tastes, and burns. Here are a few things to consider:
Read also:Exploring The Life And Legacy Of Richard Daddario A Closer Look
First off, there are different sizes of rolling papers, ranging from single-wide to king-size. The size you choose depends on how much herb you want to roll and your personal preference. For beginners, a single-wide or 1 1/4 size is usually a good starting point.
Next, think about the material. Rolling papers come in various materials, including hemp, rice, and wood pulp. Hemp papers are popular because they’re eco-friendly and burn smoothly. Rice papers are thinner and burn slower, while wood pulp papers are thicker and often flavored.
Lastly, consider the flavor. Some rolling papers come unflavored, while others have added flavors like vanilla or menthol. It all depends on what you’re in the mood for.
Tips for Selecting the Perfect Paper
Here are a few quick tips to help you choose the right rolling paper:
- Go for natural materials if you want a cleaner burn
- Choose a size that fits your needs
- Experiment with flavors to find your favorite
Remember, the right rolling paper can enhance your entire experience, so take your time and find what works best for you.
Preparing Your Herb
Now that you’ve got your tools ready, it’s time to prep your herb. This step is crucial because how you grind and prepare your herb can affect the quality of your joint. Here’s what you need to do:
Start by grinding your herb into small, even pieces. If you’re using a grinder, this part is easy. Just fill the top chamber with your herb and give it a few twists. If you don’t have a grinder, you can use scissors or your fingers to break it down into smaller bits.
Be careful not to grind it too fine, though. You want your herb to be small enough to fit easily into the joint but not so fine that it turns into dust. Aim for a texture that’s somewhere between coarse coffee grounds and sand.
Once your herb is ground, set it aside for now. You’ll use it in the next step when it’s time to roll your joint.
Adding a Filter or Crutch (Optional)2>
Adding a filter or crutch to your joint is optional, but it can make a big difference in the overall experience. A filter helps prevent you from inhaling loose herb, keeps the joint from unraveling, and makes it easier to hold.
To make a crutch, simply take a small piece of cardboard, rolling paper, or even a business card and roll it into a tight cylinder. Make sure it’s small enough to fit inside the rolling paper but sturdy enough to hold its shape.
Once you’ve made your crutch, place it at one end of the rolling paper. This will serve as the base of your joint and help keep everything in place as you roll.
Why Use a Filter?
Using a filter or crutch has several benefits:
- It keeps loose herb from falling out
- It makes the joint easier to hold
- It improves airflow and makes the joint burn more evenly
Of course, if you prefer a filter-free joint, that’s totally fine too. It’s all about personal preference!
Step-by-Step Guide to Rolling a Joint
Alright, it’s time to put everything together and roll your first joint. Follow these simple steps, and you’ll have a perfectly rolled joint in no time:
Step 1: Place your rolling paper on a flat surface with the sticky side facing up. If you’re using a crutch, place it at one end of the paper.
Step 2: Sprinkle your ground herb evenly along the center of the paper, leaving a little space at each end. Be gentle and try to distribute the herb as evenly as possible.
Step 3: Use your fingers to gently pack the herb down, making sure it’s not too loose or too tight. You want it to be firm but not compacted.
Step 4: Begin rolling the joint by lifting one edge of the paper and tucking it under the herb. Use your fingers to shape the joint into a cylinder as you roll.
Step 5: Once you’ve rolled the joint into shape, lick the sticky edge of the paper and seal it tightly. Give it a gentle squeeze to make sure it’s secure.
Step 6: Finally, give your joint a quick roll between your fingers to smooth it out and make it even. And there you have it—your very own hand-rolled joint!
Common Mistakes to Avoid
Rolling a joint might seem simple, but there are a few common mistakes that can trip up even the most experienced rollers. Here are a few things to watch out for:
- Overpacking the joint: Too much herb can make it difficult to roll and burn unevenly.
- Using the wrong paper: Make sure you’re using the right size and material for your needs.
- Skipping the crutch: While optional, a crutch can make a big difference in how your joint feels and burns.
- Rushing the process: Take your time and focus on each step to ensure a smooth and even roll.
By avoiding these common mistakes, you’ll be rolling like a pro in no time!
Tips for Perfecting Your Technique
Like any skill, rolling a joint takes practice to perfect. Here are a few tips to help you improve your technique:
First, don’t be afraid to experiment with different tools and techniques. Try different sizes of rolling papers, use a grinder or not, and see what works best for you.
Second, practice makes perfect. The more you roll, the better you’ll get. So don’t get discouraged if your first few attempts aren’t perfect. Keep at it, and you’ll soon be rolling like a pro.
Lastly, have fun with it! Rolling a joint is more than just a skill—it’s an experience. Enjoy the process and take pride in your work. After all, the journey is just as important as the destination.
Advanced Techniques for Seasoned Rollers
If you’re already comfortable with the basics, here are a few advanced techniques to try:
- Twist the ends of the joint for a cleaner look
- Experiment with different shapes and sizes
- Try rolling a spliff or adding a little extra flair
These techniques can take your rolling game to the next level and make your joints stand out from the crowd.
Conclusion: Roll Like a Pro
And there you have it—everything you need to know about how to roll a joint like a pro. Whether you’re a beginner or a seasoned roller, this guide has got you covered. Remember, practice makes perfect, so don’t be afraid to experiment and find what works best for you.
Now it’s your turn! Try rolling a joint using the techniques we’ve covered and let us know how it goes. Feel free to leave a comment below or share this guide with your friends. And if you’re looking for more tips and tricks, be sure to check out our other articles on the site. Happy rolling!
Table of Contents
- Why Learning How to Roll a Joint Matters
- Essential Tools You’ll Need
- Choosing the Right Rolling Papers
- Preparing Your Herb
- Adding a Filter or Crutch (Optional)
- Step-by-Step Guide to Rolling a Joint
- Common Mistakes to Avoid
- Tips for Perfecting Your Technique
- Advanced Techniques for Seasoned Rollers
- Conclusion: Roll Like a Pro